Showing posts with label bread. Show all posts

Saturday, July 24, 2010

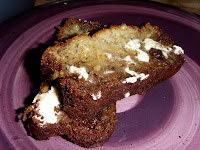
Raisin-Banana Quinoa Bread

recipe adapted from Delight Gluten Free magazine 


CLICK TO ENLARGE
You can find Amy's flour mix here or use your own GF all-purpose flour mix


DIRECTIONS:

- Preheat oven to 400 degrees
- In a large bowl, mix the cooked quinoa, flour, sugar/Splenda, salt, baking powder, and baking soda
- In a small bowl, mash the banana(s) (a fork works really well for this!)
- Add eggs and honey to banana and mix well
- Add the wet ingredients to the dry and mix well
- Fold in the raisins and nuts
- Pour into a greased 8x4 loaf pan
- Bake for 20-25 minutes (until toothpick comes out clean)
- Cool the loaf in the pan 10-15 minutes
- Slice it up, serve it up, and eat it up!! :-)


As always with banana bread, this recipe is very versatile. You can incorporate any fruit you want (raisins, cranberries, etc), nuts, chocolate chips, WHATEVER! I will definitely have additional versions of this recipe here on the blog in the future. Have another idea of what to try?? Send me suggestions!

Wednesday, July 21, 2010

Light and Fluffy Drop Biscuits

Recipe adapted from Gluten Free Cooking School

Talk about something worth writing home about! Go on...get your pad and pencil, or break out your fancy stationary...it is well worth it! We'll wait....

Alright...I can't lie...I've been looking forward to trying these. I have spent quite a bit of time looking over various recipes for drop biscuits. Having tried a few others, I will say that, without a doubt, this is the best recipe I have found. I am looking forward to using this versatile recipe to try a lot of different things. Have no fear...I'll share my successes (and my failures...just so you don't have to!)

INGREDIENTS:

- 1 1/2 c. brown rice flour (I did not have any brown rice flour left, so I used 1 cup of white rice flour and 1/2 cup of sweet rice flour. It worked really well!)
- 2 c. corn starch
- 1/2 c. sorghum flour (this is the trick to making these light and fluffy! I have made drop biscuits with other recipes that turn out much more dense. These are a WONDERFUL change.)
- 2 tsp. baking powder
- 2 tsp. salt
- 1 1/2 tsp. baking soda
- 2 tsp. xanthan gum
- 1 stick of butter (chilled in freezer)
- 1 c. milk (can use soy if you cannot use dairy, but I used 2% cow)
- 1 T cider vinegar (if you want, omit the milk and cider vinegar and substitute 1 cup buttermilk. This will serve the same role!)
- 1 c. water
- 1 egg, beaten

DIRECTIONS:

- Preheat oven to 350 degrees
- In a large mixing bowl, combine first seven ingredients (flours through xanthan gum)
- Grate the butter into the flour mix using the small-holed side of a box grater
- Mix the butter into the flour mix so that there are no large balls of grated butter
- Add the milk, cider vinegar, water, and egg to flour mix and stir until combined (How easy is this recipe?! I know..I'm excited too!)

- Drop the dough onto a greased cookie sheet and bake for 15 minutes or until the tops start to turn golden brown

(The original recipe says that this will make 16 biscuits; however, mine made about 22. It totally depends on how big of biscuits you want!)


I could not be more pleased with how these biscuits turned out. Tonight I served them with Cowboy Beans (don't worry...that recipe is coming to you directly after this one). The meal was so good that it really kind of hurt *GRIN* Sam and I are still moving slowly around the house (if we're moving at all)!

I will definitely be using these for biscuits and gravy and all sorts of other things. Again, the light and fluffy consistency of this bread is FANTASTIC - especially since I am also allergic to yeast and just don't get that very often! Whew!

Another idea is to add garlic and shredded cheese to the dough. Once they are baked, I would brush the tops with butter and sprinkle on some garlic salt. Can we say Red Lobster-like?! I am excited!! It's the little joys in life....

Stay tuned for the Cowboy Beans and...if you're lucky...I'll even share our dessert!

Tuesday, June 22, 2010

Blueberry Breakfast Pound Cake

Alright folks. I need to apologize because it's been so long since I've shown my face. That's what happens when life gets hectic! ACK! Have no fear, though...I've been cooking and baking so I won't let you down!

This lil' dandy is well worth making. I can go on and admit that I'm addicted to this one (especially since, after sharing part of the cake with my aunt, she immediately sent me a text to let me know she was addicted and needed the recipe!!) *big grin* So...y'all ready?!

Originally, this is called Glazed Blueberry Pound Cake. I would LOVE to be able to tell you exactly what recipe I adapted this from, but it was copied out of a newspaper several years ago. This is the first time I have ever made it, and I adapted it to be GF. Now, that being said, I decided to make a truly more healthy version (not the "healthy" version where you add extra butter and sugar, even though I REEEEEALLY like THAT kind of healthy!) At the end of this I will include the glaze recipe. I am sure it's phenomenal (how can sugary glaze NOT be phenomenal?!) but I have not yet tried it. The healthy version was my attempt at making a delicious, enjoyable breakfast. For me, it worked out GREAT. Oh...and it makes a delicious, enjoyable brunch, lunch, afternoon snack, supper, and pre-bed snack, too *heehee*

INGREDIENTS:
1 3/4 cup Amy's flour mix, plus 2 TBL. (or whatever GF all-purpose flour you prefer)
1 tsp. baking powder
1/4 tsp. salt
1/4 tsp. cinnamon (I'm a bit addicted to cinnamon, too, remember? So I use 1/2 tsp.)
3/4 cup butter
1 cup sugar (I use 1 cup of Splenda)
3 eggs
1/2 tsp. lemon juice
1/2 cup apple juice
1 1/2 cup blueberries

DIRECTIONS:
- Preheat oven to 350 degrees (if you use a glass loaf pan as I did, decrease the temp to 325 degrees)
- Whisk 1 3/4 cup flour, baking powder, salt, and cinnamon
- Cream butter and sugar until light and fluffy (the recipe recommends an electric mixer. For those of us that don't have that sort of fancy-smancy appliance, a regular whisk and a lot of elbow grease gets the job done quite well) *grin*
- With mixer on low (or with your hands moving the whisk a little slower because now you're worn out from creaming the butter and sugar), add eggs one at a time and mix well.
- Add lemon juice and apple juice and mix well.
- Add the dry ingredients and whisk (on low if using mixer) just until mixed.
- Place blueberries in a bowl and dust with the remaining 2 TBL of flour, tossing to coat evenly.
- Add the berries to the batter and discard excess flour.
- Gently fold in blueberries.
- Bake 40 - 50 minutes until toothpick inserted in the center comes out clean.
- Cool in the pan for 15 minutes and then move it to cook on a wire rack (or a kitchen towel on the counter like I did!) for about an hour

And let's be honest...there's nothing better than cake/bread that is fresh out of the oven and still warm. So ask yourself....do I REALLY have to wait the entire hour?
- Cut into thick slices and enjoy (and if you'd like...drizzle with the glaze and enjoy it that way)

Glaze:
Whisk 2/3 cup powdered sugar with 2 TBL of apple juice. Drizzle over cake slices.

I will absolutely be making this again. It is incredibly moist, and, unlike a lot of GF recipes, it doesn't crumble the second you touch it! Super excited about that one! I'd like to give it a try with fresh strawberries next time, and I bet you could add some mashed banana! You could add nuts or chocolate chips or whatever in the world you want to. If you have some good ideas and think something should be tried (and maybe you don't have the time to try it yourself first), leave me a note and I'll make it soon. Sam needs to try this good stuff, so I can use the two of us as your guinea pigs!

Friday, May 7, 2010

Bread - the real deal

So this recipe is taken from "A Mess O'Greens - and Other Joys of Living: A Scot's Survival Manual South of the 31st Parallel" (a cookbook that belonged to Aunt Callie and was passed on to me, written by Lance Anderson)

But here's the deal...I didn't get this from a cookbook. This recipe was taught to me - not read - by my grandmother, Nahn. She told me she grew up eating this. The kiddos would run through the kitchen as Big Nannie (my great grandmother) cooked up some hoecakes. They'd pinch off the cooked edges of the bread, and by the time they were done pinching, there was only a little circle left on the plate! If you try these, you'll understand exactly how this is possible. This is the PERFECT bread for me - simple goodness with no gluten and no yeast!

The first time I ate these, Sam and I had gone to eat Sunday lunch at my grandparents' house. As we finished up the meal (which included SEVERAL hoecakes for me), Sam and my grandfather turned their attention to icecream for dessert. When a bowl was offered to me, all I could say was "Not a chance...I'm going to eat more of this cornbread!" I remember telling Sam, "this is the first real bread I've had in MONTHS - don't judge me!!" (with a big grin on my face). This is a simple, mmmm-azing, good ol' tried and true Southern recipe that is worth passing down. Thank you, Nahn, for passing it on to me. I'll pass it on to these fine folks, and one day...to your great grandkids.

The following is an excerpt from the cookbook (with my two cents added in here and there):

HOECAKE

Hoecake is the favorite among experienced eaters of cornbread. Corn chips of recent invention are only thinner versions of hoecake. The flavor is the same. It is the bread of choice when there are only a couple of people in the house. A proper hoecake will serve just two people.

1 cup waterground cornmeal
1/2 tsp. salt (I don't follow this. We like salt, and I don't like to measure...so...) *GRIN*
Boiling water
Oil to fry bread

- Mix cornmeal and salt in mixing bowl.
- Add boiling water slowly until mixture closes quickly behind a stirring spoon.
- Pre-heat oil (I heat mine to Medium heat)
- Pour batter into oil (you can do enough to fill the pan or put in spoonfuls)

- Stand over it and enjoy the aroma.
- When the edge of the hoecake is amber-colored and crisp, flip the hoecake (uncooked side down).

At the first smell of burning, turn the hoecake out on a cooling rack (I use a plate covered with paper towels to absorb some of the oil).

We ate ours with ground meat and cheese, freshly cooked cabbage, and black-eyed peas. Absolutely IMPOSSIBLE to beat. If you want to do this in a healthy manner, slather on some butter and top with honey - YUUUUUUUUUUUM :-P

Wednesday, April 28, 2010

Bun in the oven...

It's NOT what you think!
They're just rolls... :-D

You know what I miss?

CRESCENT ROLLS

That's right. Those yummy "I'd-stop-eating-these-but-it's-just-not-humanly-possible" golden brown baked goodies. They're those nice, tasty, rolled-up packages of goodness. You know the ones I'm talking about...

Well...here's that...coming to you in a pretty tasty gluten free package :-)

INGREDIENTS:

- 1/2 stick butter (1/4 cup), room temperature
- 3/4 cup small curd cottage cheese (you can use regular, light, or fat free)
- 1 cup Amy's flour mix (this had GREAT flavor. I promise I'm not saying that because I'm biased...it really did)
- 1/4 tsp. xanthan gum (if you use a GF flour mix without any xanthan gum in it, use 1 tsp)
- 1/8 tsp. salt
- 1/4 tsp. cream of tartar (I'll be honest....I had to call my grandmother to ask where exactly to find this. If I hadn't, I'd still be wandering the baking aisle at H-E-B. Thanks for saving me, Nahn!)
- 1/2 tsp. baking soda
- 1 TBL sugar

DIRECTIONS:

- In a mixing bowl, combine butter and cottage cheese
- Add dry ingredients to the bowl and mix until a ball forms (I did it the simple way...just a bowl and a spoon - no mixer)

- Wrap the dough in plastic and chill for at least 2 hours
- Preheat oven to 350 degrees
- Dust counter top or parchment paper with flour
- Roll dough into 14" circle
- Cut circle into 8 triangles (use a pizza cutter - it's THE BEST)

- Roll each triangle up (just like those other crescent rolls you used to miss)
- Place the rolls on a baking sheet lined with parchment paper (unless you don't have any in the house *sheepish grin*)

- Using pastry brush (or your finger like I did!) brush the top of each roll with melted butter
- Bake for approximately 20 minutes (mine started to get a tad brown on the bottom before they were baked entirely, so I turned mine over. Sure, they weren't spectacularly pretty, but it worked! No burned bottoms!)


We added a little extra butter and ate these just "as is" with a meal of baked fish, squash, and green beans. They'd be a wonderful addition to any meal. Certainly, they aren't exactly like the crescent rolls you buy in the can at the store, but for a gluten-free, yeast-free bread option...these just can't be topped!

Stay tuned because I plan to use this recipe for apple dumplings (that I learned how to make from my mother and her Bed & Breakfast cooking), cinnamon rolls, AND pig-n-a-blankets!! CAN'T WAIT!!

Speaking of not being able to wait...Sam felt the need to point out that a bit of honey on these lil' babies would probably make a pretty good "follow-up" to the meal. We don't want to waste food, you know. We were too stuffed to try it right after the meal but now....