Showing posts with label Main dish. Show all posts

Monday, September 27, 2010

Mango chicken tacos

This recipe was adapted from $5 dinners: Mango Chicken Lettuce Wraps. I made several changes to make this a little more "do-able" for our situation - GF, no grill, and cheap! *BIG GRIN*


If you could see me, you would know I am on my knees begging you to go make these. You won't regret it. Go!

INGREDIENTS:

- 3-4 boneless, skinless chicken breast halves
- 1 cup mango marinade (READ THE INGREDIENTS!!! PLEASE!! If you are not 100% sure...contact the company. I use Bronco Bob's Roasted Mango Chipotle Sauce. It is incredible! If you are NOT gluten-free...KC Masterpiece apparently makes a yummy one as well.)
- 1 large mango, diced
- 2 dashes of garlic powder (to taste)
- Salt and pepper (to taste)
- 1.5 TBL mango marinade

DIRECTIONS:

- Marinate chicken for a couple of hours (place in gallon-sized Ziploc bag, pour in the 1 cup of marinade, and set in refrigerator)
- Preheat oven to 350 degrees
- Place chicken in baking dish and pour marinade on top
- Cover the pan with foil and cook for approximately 40 minutes (every 10 minutes I took the chicken out and redistributed the sauce back over the chicken)
- Remove chicken from pan, dice, and place it back in the pan
- Cook for an additional 15-20 minutes

While chicken is cooking, create mango salsa:
- Combine diced mango, garlic powder, salt and pepper, and 1.5 TBL of mango marinade


I served the chicken on top of corn tortillas and topped the chicken with shredded lettuce, mango salsa, and black beans. I ate mine as lettuce wraps. YOU CHOOSE!


I'd like to point out that the response to these was: "Wow. This is restaurant caliber. Can I have three more?" Toot! Toot! :D

Monday, September 20, 2010

Huevos Rancheros

 A GREAT way to save a little on your grocery bill is to occasionally cook breakfast for supper. "Huevos Rancheros" enter stage left. Talk about a yummy, cheap, incredibly easy breakfast, lunch, OR supper! Right up my alley (and I know it's up yours too!). This recipe is a combination of one used by my sister-in-law with a couple of random additions of my own.


INGREDIENTS:

 - Corn tortillas
 - Oil for frying tortillas
 - Eggs
 - Shredded cheese
 - Ranchero sauce
 - Black beans, corn, or whatever else you want (optional - I did not add any of this during this go-around, but give it a whirl!)

Ranchero sauce:

- Bacon (I use turkey bacon)
- 1 small onion, chopped
- 1 can Rotel
- 1 can tomato sauce 
- Garlic powder (to taste)
- Cumin (to taste)

DIRECTIONS:

- Cook bacon. Remove from pan and place on plate (covered with paper towels to soak up grease!)
- Saute onions (in the bacon grease) - YUM! I'll admit that there is very little grease if you use turkey bacon, but a little bit of cooking spray / butter will do the trick.
- Add the Rotel and tomato sauce to the onion and cook until warm
- Crumble bacon into the sauce and VOILA! (as my sweet sister Doni says in her version of the recipe)

- Heat a small amount of oil in a skillet and brown the tortillas (approximately 1 minute per side).
- Remove each tortilla as you brown it and place between paper towels

- Fry an egg/egg white
- Immediately place the egg on top of a tortilla already topped with shredded cheese (this is the sneaky way to melt the cheese!)
- Top each egg with a few tablespoons of the sauce
- Now get to work!!!


Random note from the kitchen:

This sauce is great on the eggs without the tortillas and cheese (this was breakfast for me this morning). Moreover, it makes a SPECTACULAR way to spice up a plain ol' baked potato (this was lunch for me today) *GRIN* Have at it!!

Tuesday, September 7, 2010

Apple-cheese-turkeyballs


This recipe is (almost) directly from A Year of Slow Cooking. I just couldn't help but share! I made a couple of minor changes and did not cook these in the crockpot because I was too busy today to get started on time. It is an easy meal to make either way!


You read that right...turkeyballs. I figure that "turkey meatballs" is like saying Rio Grande River. *grin*

So most meatballs are made with breadcrumbs. Two issues with that: #1: breadcrumbs are made with...well...BREAD! (don't worry...there are gluten free breadcrumbs). The issue with that presents problem #2: that whole pesky yeast allergy.

These meatballs are a WONDERFUL change from the typical. The added fruit provides the best taste to counteract the onion. These are a phenomenal surprise. I can't get enough.

When my husband is super delighted with a meal, he'll often say "so tell me about these." Translated: "These are really good. What'd you put in these to make them so great?" (Granted, that may not be verbatim, but that's how I hear it! *BIG GRIN*) I was pleasantly surprised at how much we both liked this meal.


INGREDIENTS:

- 1 lb. ground turkey (I use 99% lean)
- 1 egg, beaten
- 1 tsp. salt
- 1 tsp. coarse ground black pepper
- 1 tsp. onion powder
- 1 Granny Smith apple, peeled and shredded (the easiest way to make this happen is with a cheese grater!)
- 1/4 cup craisins (dried cranberries)
- 1/2 cup shredded cheese (the recipe calls for sharp cheddar, but I use "ol reliable" - the same reduced fat Colby Jack I always use)

DIRECTIONS:

- Preheat oven to 375 degrees
- Spray/grease a 9X13 baking dish
- In a bowl, mix the ground turkey with all of the ingredients (you can have as much fun as you want with this. I do! Use your hands - don't be afraid to get dirty!)
- Make golf-ball-sized meatballs and place them in the pan (I made 16 meatballs with this recipe)
- Bake the meatballs for 20-25 minutes (halfway through the baking I flipped the meatballs to make sure they were cooked evenly).


I served these up with some steamed broccoli and hoecakes. I ate my meatballs with nothing added, but a little ketchup does the trick for those that are "big dippers."

So, to be honest, I was blown away by these. As we sat eating I kept making that "uuuuuugh" noise of satisfaction with the food (okay...and myself). Several times I commented on how great the meal was. Finally, Sam said "You know, hon, you sure worked hard on this meal. How do you feel about the food?" The meatballs turned out to be mighty fine (and healthy) food...what can I say?!

Sunday, August 29, 2010

Overloaded Twice-Baked Potatoes

Recipe adapted from Eating Well.

I have a confession. I could eat baked potatoes every day. In fact, one of my FAVORITE things to do this summer has been to meet my mamma at a local restaurant here for a big baked potato and a massive glass of iced tea. Oh man...if I could do that every day.... When I first got all of my food allergies figured out, I had to avoid potatoes for a while. CHAD (Crushed Hopes And Dreams). Need I say more? Potato was one of the very first reintroductions I made!

A good baked potato is just hard to beat. Here's the problem with them though...I don't like bites that include only dry potato. I like when everything is mixed up together so you get all the flavor AND it's not too dry. These twice-baked potatoes are the answer to the quandary created by regular ol' baked potatoes and those dry, tasteless bites! You're welcome! *big grin*

I won't lie...these do take a bit of effort; however, they are more than worth the time put in. The best part is that you'll have plenty of leftover "potato guts mix" (that's right...you read that right) to eat the next day!

INGREDIENTS:

- 4 medium baking/russet potatoes
- 8 oz. lean beef (I used 93% lean because it was on sale! That's BIG news around here!)
- 1/2 small onion, diced
- 1/2 tsp garlic powder (or to taste...I just add until I think it's enough!)
- 1 cup broccoli florets, finely chopped (I used frozen)
- 1 cup water
- 1 cup shredded cheese, divided (I use the same Reduced Fat Colby Jack cheese I use in all my recipes.Don't forget to notice that it says divided. If you get trigger happy and start dumping it all in, you'll be FORCED to add more cheese later. And we don't want that, do we?! (SNEAKY GRIN)
- 1 container (6 oz.) plain, non-fat Greek yogurt (This isn't as crazy as it sounds...Follow me: this is a great substitution to use in place of sour cream (as called for in the original recipe). I used the Yoplait 2x Protein Greek yogurt - labeled gluten free!)
- Green onions (chives)
- Salt to taste (I use Lawry's Seasoning Salt)
- Pepper to taste (SOOOO good with course ground black pepper)

DIRECTIONS:

- Bake potatoes (You can do this in the oven in the traditional way if you'd like. For faster results (and food in your hungry tummy at an earlier time!), use that lovely piece of machinery: your microwave.) 
(1) Pierce each potato with a fork
(2) Place in microwave and cook at 50% power for approximately 20 minutes (until the potatoes are soft); turn once or twice during this time
NOTE: If your microwave has a "baked potato" setting on it....go that route.

- Brown meat in skillet with onion and garlic powder; place in large bowl
- Cook broccoli as directed (if using fresh, add broccoli and water to the skillet you used for the meat, cover, and cook until tender - no sense in cleaning TWO pans!)
- Drain broccoli and add it to the meat
- Cut off the top third of each potato (Save these for another use. Tomorrow I'll be using ours for baked potato skins as a side dish. YUM.)
- Scoop all the insides out of the potatoes and into another bowl.
- Mash the potatoes up with a fork to break up any big clumps (Though not called for, I used just a few sprays of zero calorie butter spray to add a little moisture. You could use water or even a bit of chicken broth if you wanted, or don't use a thing! It's all up to you!)
- Place the shells of the potatoes in a baking dish or on a plate and set aside (It's difficult to make twice-baked potatoes if you don't have anything to twice-bake the potatoes in! *GRIN*)
- Add cheese, yogurt, water, salt and pepper to the potatoes and mix it all together well
- Add the meat and broccoli mixture to the potatoes and mix again
- Finally, fold in the green onions
- Scoop the potato guts back into the potato skins (I would say divide the mixture evenly as the original recipe mentions; however, that would NEVER work. I only used about 2/3 of the mixture because there was no room left for the rest! Save the extra mix to eat for lunch tomorrow...that's my plan!)
- Top each potato with some of the remaining 1/2 cup of cheese
- Put the plate/dish of potatoes back in the microwave for approximately 3 minutes...until the cheese on top is melted (that should be a pretty good indicator that the insides are warm enough).
- Serve it up!


I didn't serve this meal with anything else. We had potatoes and potatoes alone :-) These potatoes are essentially a meal in an edible boat...how could you want for more?!

NOTE: There are SOOOOOOO many variations to this recipe that would be incredibly YUMMO.
- Sauteed mushrooms and onions
- Salsa, pepper jack cheese, and corn
- Beans
- Meatless (double the veggies and cheese)
- Barbeque sauce and pulled pork
- The sky is the limit!!!

I will absolutely be making more versions of this soon. Let me know how yours go...

Monday, August 2, 2010

Cajun-style Cabbage Rolls

In my house, we often use variations of one particular phrase (typically in reaction to some of the silly things Walle (our puppy) will do...the situations he seems to manage to create):

- oh my (surprise/exclamation)
- oh my goodness (super exclamation)
- oh m' goodness gracious me (reserved for the real serious stuff...you know it has to be serious when all you can muster up is a shortened utterance of the word "my")

For example, you walk in to this...


...and you say "oh m' goodness gracious me"

Well this meal is SERIOUS STUFF, folks. So oh m' goodness gracious me, somebody go make this! Please. Do it for me (just because I know you'll thank me later). Ugh. So good.

In my house, we seem to have some sort of rating system. Really, nothing gets rated unless it is in about the top five favorite dishes/meals of each individual in the household. Though he desperately wants to, Walle doesn't count, as he can no longer get fed from the table (sad day). Last night I made one of Sam's top meals: Ground beef sauteed with onion and seasoning and served with melted shredded cheese, cabbage, and beans (last night's beans were of the Ranch Style variety). YUM. So....here's the predicament: every time I make cabbage we have leftovers. Well, cooked cabbage tastes and looks alright reheated the next day, but any length of time after that and you're looking at a questionable dish. So I set out on yesterday's endeavor with a strategy: save some of the big leaves of cabbage and try to make cabbage rolls today. Rock on! I've come across several recipes in the last month, so I began today thinking that I'd combine a couple of the recipes and give it a shot. Well....I'm cheap, remember? Couple that with the fact that I want to make things as simple as possible, and you end up with a lady using whatever she has in the freezer and/or cabinet to make a new dish (BIG GRIN). So I had some frozen andouille sausage that I typically use to make Amy's New Orleans Chili (don't worry...will share this soon). Given the fact that none of the recipes I could find for cabbage rolls say ANYTHING about Cajun style, I decided I'd strike out on my own. The result: a PHENOMENAL supper. That's right *TOOOOOT TOOOOOOOT* (my own horn again!) The final point to this story: this dish (served with fried cornbread/hoecakes) is now in my top 5.

INGREDIENTS:

- 6 large leaves of cabbage
- 2 c. andouille sausage, chopped (I use HEB's Hill Country Fare brand, as it is labeled GF. Don't forget to remove the casing!)
- 1 medium onion, chopped
- 2 cloves garlic (or I use 1 tsp. minced garlic - even though I LOVE cooking, I HATE when my fingers smell like garlic for several days...even after washing and rewashing then scrubbing with lemon and washing again!)
- 1/2 c. cooked rice
- 1 cup shredded cheese
- 1 egg, beaten
- salt and pepper to taste (I use course ground black pepper)
- 1 tsp. Cajun seasoning
- 1 can diced tomatoes (I use the fire-roasted garlic kind)
- 3/4 cup water

DIRECTIONS:

- Preheat oven to 375 degrees
- In a large pot, boil the cabbage leaves for 3 minutes
- Remove from the pot, and set the leaves aside to cool
- Heat/brown the sausage with the onion and garlic
- In a bowl, combine the meat mix, rice, seasonings, cheese, and egg


- Place a couple of heaping spoonfuls (1/6 of mixture) in the middle of a cabbage leaf

- Fold in two of the edges....


- Then close up the roll (like a box or wrapping a present!)


- Repeat with the rest of the leaves and the remainder of the mixture
- Place cabbage rolls in a 2 qt (8x8) baking dish


- In bowl, combine the can of diced tomatoes and the water
- Once mixed, pour this over the cabbage rolls


- Cover with foil and bake in the oven for 1 hour
- Uncover and bake for 15 more minutes
- Remove from oven and let cool for just a few minutes before serving.

What's funny is that, before tonight, I had never once eaten a cabbage roll. If you look around, it is hard to find an appealing photo. Despite all that, these. taste. mmmmmm-azing. That's right. I will, without a doubt, be making these again...as soon as humanly possible.


YUM.

Tuesday, July 27, 2010

Potato-Cheese Soup


So all that to say....here's my version of the tasty combination of potatoes, cheese, and bacon (in soup form).

INGREDIENTS:

- 6 potatoes (I used new potatoes so it took about 8 of them - washed, peeled, and cubed)
- water to cover
- 1 onion, chopped
- 1 TBL margarine
- 3 cups milk
- salt and pepper to taste (I used a bit of Lawry's salt as well as some garlic salt)
- 2 TBL chicken broth
- 8 oz. processed cheese, cubed (Velveeta!)
- 1 TBL cornstarch
- 1/2 cup milk

DIRECTIONS:

- Place cubed potatoes in large pot and cover with water
- Boil for 10-15 minutes or until tender
- While the potatoes boil, sauté onion in margarine in a skillet over medium heat for about 10 minutes
- Once the potatoes are tender, drain all but about 2 cups of water
- At this point, I mashed up the majority of the potatoes with a fork - rather haphazardly, mind you! There is no right or wrong way! This is an optional step; I just like thick soup.
- Add the onion and replace the water with 3 cups of milk
- Reduce the heat to low and and season with salt and pepper
- Stir in the chicken broth and heat slowly
- Add the cheese, allowing it to melt completely (stirring as needed)
- In a small bowl, dissolve the cornstarch in 1/2 cup milk and add to the soup
- Mix the cornstarch mixture into the soup and heat until soup is at desired thickness


To each of our bowls, I added some crumbled turkey bacon as well as some shredded cheese. Hey...don't judge - there's never enough cheese *GRIN* I served this with leftover light and fluffy drop biscuits. This makes PLENTY of soup for a larger family or leaves you with "re-do's" for lunch or supper the next day.

Chebe's Corndogs

Recipe is from Delight Gluten Free magazine


Now, since the main ingredient in Chebe's is manioc (tapioca) flour, I suppose that CORNdog is a bit of a misnomer. Nevertheless...these babies are GREAT.

It has been entirely too long since I've gotten to partake in eating a corndog. Period. A few months after being diagnosed with Celiac Disease, I did purchase some GF corndogs at a store; however, I think my savings account may still be recovering! :-) Alright...so it isn't THAT bad, but it certainly is nice to be able to make something a bit cheaper (and even more yummy) for yourself.

INGREDIENTS:

- 1 pkg. of Chebe's All-purpose Mix
- 2 eggs
- 2 TBL oil/butter/margarine
- 5 TBL milk (plus a little more in case the dough is too dry)
- package of hot dogs (there is enough dough to make 6 so you'll have a couple left to feed the dog)
- wooden skewers

DIRECTIONS:

- Preheat oven to 375 degrees
- Prepare the dough as directed on the Chebe's All-purpose Mix package
- Divide the dough into about 6 equal pieces and flatten each out to a thin layer (Instead, I flattened the entire piece of dough out into a thin layer and, using a pizza cutter, cut the dough into 6 pieces)


- Poke a small wooden skewer through each hotdog to hold after the corndogs are cooked (I didn't have these - as you can tell from my lovely pictures- but the corndogs worked just fine as finger foods!)
- Poke a few holes in each hotdog with a fork (I did not do this, and as the hotdogs began to swell as they cooked, the dough was split)
- Wrap the dough around each hotdog (yep...I suppose this would be more like a lil doggie in a blankie!)
- Place the corndogs on a baking dish / cookie sheet and bake until the bread appears done (mine took about 20 minutes)


I served the dogs up with some baked beans and we enjoyed every bite. I would like to point out that I got this response from my husband: "Honey...I just ate 3 1/2 of your corndogs. I usually only eat two real ones....if that! Sounds to me like you did a great job..." (big grin from me!) Plus I know he would have eaten 4 if I hadn't have stolen the other half as I walked his plate of seconds to him!
--------------------------------------------------------------------------------------------
So...I mentioned earlier that you'd have a couple of hotdogs leftover to feed your own dog. Welp...our poor lil pup has food allergies (like mother like son, huh?). Now when I cook, it never fails that Walle sits at the edge of the carpet next to the kitchen and waits. Waits. And does a little more waiting - just in case I get sloppy and drop something. It's the only shot he's got, folks. So...just like every other night, Walle was sitting at his post. Turns out, there was a mostly deceased cricket nearby. So Walle began his puppy duty of swatting it about and I told him to cut it out (haha!) So...here is Walle doing as a puppy will do....


And...moments later (after being reminded that it'll probably make him sick to eat it)...adamantly insisting that he is NOT playing with the cricket


So...you see why it takes me so long to get things done around here...How can you ignore a face that cute?! It's the little joys in life. I just thought y'all should know what my sidekick was doing as I made this new meal :-)

Wednesday, July 21, 2010

BBQ Cowboy Beans

Recipe is adapted from $5 dinners
(This is a GREAT blog. For anyone who likes to cook things that are budget friendly whenever possible (who doesn't!?), this is worth checking out. There are some meals listed as gluten free; however, others (like this one) are pretty easily converted. Other allergen-friendly meals are available as well.)

INGREDIENTS:

- 1 lb. lean ground beef
- 1/2 onion, chopped
- Lawry's salt (or other seasoned salt, or just omit if you don't want the extra sodium)
- 2 garlic cloves, crushed (I use 1 tsp. minced garlic)
- 1 (15 oz.) can black beans, drained and rinsed
- 1 (15 oz.) can pinto beans, drained and rinsed
- 1 c. BBQ sauce (Sam and I are faithful fans of Head Country BBQ sauce. It is labeled GF and all versions are incredibly tasty)
- 1 (15 oz.) can petite diced tomatoes
- a few shakes of Worchestershire sauce (check to confirm yours is GF! I use French's)
- 1 TBL sugar (brown or white - just to cut the tang a bit if you want to)

ADDITIONS:

- 1/2 bag frozen corn - cook as directed (I cooked a couple of ears of fresh corn. You can just throw this last ingredient in right before you serve or use it as a side dish - your choice! Our thoughts: "why have to return the fork to the plate and back to your mouth TWICE when you can just do it once!?") *GRIN*
- DROP BISCUITS (these MAKE the meal)

DIRECTIONS:

- Brown beef with onion, garlic, and seasoned salt (to taste)
- Add beans, BBQ sauce, and tomatoes, sugar, and Worchestershire sauce
- Let simmer (the original recipe calls for only 10 minutes; however, I am a firm believer in the fact that meals such as this (chili, etc.) are better the longer they cook. I let mine simmer on low for almost an hour; however, you just do your thang! To be honest, the only reason I was able to make it that long without eating was because I was busy baking biscuits.)

I served this with some shredded cheese and then we had at it. We've got plenty left for "re-dos" (as leftovers are called in my family), and that is always the best part. I'll be making this meal again soon.


Monday, July 19, 2010

A+ Lasagna

Confession #1: The only reason I am on here blogging is that there is no room left in my stomach. If there were, I would be downing another helping of this lasagna. I only wish I could tell you I'm lying. I'm not.

Confession #2: We'll call this A+ Lasagna because it is a mixture of ingredients my mother (Andrea) suggested and my own (Amy). Clever...I know. *GRIN*

Confession #3: The measurements for all of the seasonings are what I like to call a guesstimate. I tend to just add to taste or until I like the "feel" of it rather than actually measuring. I think I am close...so make it yours!

INGREDIENTS:

- 8-10 rice lasagna noodles (whatever kind you find that is GF is just fine. I used DeBoles rice lasagna. Please don't forget to double check the package you buy, but for the rice lasagna, you do not boil prior to putting the noodles in the casserole as you would with normal lasagna).
- 1 lb. lean ground turkey (you could use beef, sausage, or whatever you want)
- 1/2 cup chopped onion
- 2 TBL Italian Seasoning, divided (I use McCormick's Salt Free Italian Seasoning)
- 1 tsp course-ground black pepper
- 1 tsp minced garlic (two cloves)
- 16 oz. mozzarella cheese (Yes..it sounds like a lot. That's because it is a lot. I am not a fan of ricotta cheese that you normally find in lasagna, so I just incorporate more mozzarella. Well, that...and I like cheese. I used slices for the bottom layer and then shredded the rest.)
- 1 jar of spaghetti sauce (24 oz) (I used Classico Carmelized Onion and Garlic. Classico sauces are labeled as GF so that is always a plus!)
- 1 (8 oz) can of tomato sauce
- scant TBL of sugar
- dash of garlic salt

DIRECTIONS:

- Preheat oven to 350 degrees
- Brown ground meat with onion, 1 TBL Italian Seasoning, 1 tsp black pepper, and minced garlic.
- While the meat is cooking, combine the spaghetti sauce, tomato sauce, 1 TBL Italian Seasoning, scant TBL sugar, and a dash of garlic salt in a pot and heat
- Once meat is cooked, add the meat to the sauce mix
- Remove from heat.
- In a 9x13 baking dish, layer as follows:
- 1/3 meat sauce, noodles, cheese
- REPEAT until ingredients are gone, finishing with cheese on top
- Try to make sure that all areas of exposed noodles are covered with sauce
- Cover the dish with foil and bake for 50 minutes
- Uncover and finish baking for 10 minutes
*NOTE: when you cover the dish with foil, either cover so the foil will not touch the cheese or spray the foil with cooking spray before covering. We don't want to waste cheese by letting it stick to the foil!
Confession # whatever:
I am going to eat more.
And I am DEFINITELY making this again.

Sunday, May 2, 2010

Lazy Chicken Parmesan

Well...if that doesn't make me sound super duper motivated, I don't reckon I know what does!
So after you read this, your job is to recommend a better name for the dish. I would have put in more effort to create a better title, but I was full of Lazy Chicken Parmesan and that's all I could muster up...lazy. So maybe the name is fitting?! Don't answer that...

This dish was born out of my inability (and unwillingness) to force myself to put on my battle gear and face HEB on a Sunday afternoon just two days after military pay day. It gets crazy.
I was planning an entirely different meal for supper when I realized I had no milk. Okay...I had milk...but it had seen its better share of days (about a week and a half ago). YUCK.

I already had the chicken cooking in the crockpot (the only ingredient shared by both meals), so I went cabinet shopping and this was the result:

STEP 1: Cropckpot Chicken:

INGREDIENTS:

- 4-6 chicken breast halves (can still be frozen)
- 3/4 cup of chicken broth
- 1 TBL. Italian Seasoning (I use McCormick's Salt Free Italian Seasoning)
- 1/2 TBL butter

DIRECTIONS:

- Place chicken in the crockpot
- Pour chicken broth over chicken
- Sprinkle in the seasoning
- Cut up the 1/2 TBL butter and just drop in the pieces around the crockpot
- Cook on low for 6-9 hours or high for about 3-5 (time will vary if you have big pieces, if chicken is or is not thawed, etc.)

STEP 2:

Realize that you don't have the other ingredients you need for the meal you had planned to make with this spectacular chicken and frantically rack your brain (and pantry) for Plan B.

STEP 3: Activate Plan B: Chicken parmesan and pasta

INGREDIENTS:

- 1 jar of spaghetti sauce (you'll have to find your favorite kind that is GF. A LOT of the major brands are, but check websites and labels! I generally use Hill Country Fare (HEB brand) or Classico)
- Shredded mozzarella cheese (you can really use any kind of cheese, and you can also use sliced cheese just as easily).
- Grated parmesan cheese
- Gluten-free pasta (for 2 people I used about 1.5 cups of uncooked pasta)
NOTE: Any sort of GF pasta is just fine for this - whatever shape you want it in. Yes, I know there are proper names, but I categorize by spirally, spaghetti, macaroni, and penne. I am consistently impressed with Schar pastas. For this recipe, I happened to have Shar Multigrain Penne Rigate in the pantry. There are a LOT of good brands out there, so if you've never tried any and aren't sure where to start - shop around! Most GF pasta is made of corn, rice, a few other flours, or a mixture of these. Just take your pick!

DIRECTIONS:

- Preheat oven to 350 degrees
- Place cooked chicken breasts in a baking dish
- Cover the chicken with cheese (whether shredded or sliced, and cover with as much cheese as you want)
- Spoon spaghetti sauce over the chicken until it is entirely covered (I used about 3/4 of a jar)
- Sprinkle desired amount of parmesan cheese over the dish
- Cover dish with foil and bake approximately 15 minutes (since chicken is already cooked you just want to melt the cheese and make sure the food is heated through)

- While chicken parmesan is baking, cook pasta according to the package directions
- When both pasta and chicken are done, serve chicken parmesan over pasta

STEP 4:

Thoroughly enjoy how well your quick-change meal turned out.

STEP 5:

Realize that Plan B probably should have been Plan A from the get-go.

STEP 6:

Walk out of the office, look down the stairs to where your husband is sitting in the living room, and yell: "TOOOOOOT! TOOOOOT!" (make sure you use the proper hand gestures like a train conductor/truck driver when you make the noise)
This is you tooting your own horn. Go on...you deserve it.

Friday, April 30, 2010

Do the salsa...

Salsa Chicken, that is...

If you need a HEALTHY, EASY, CHEAP (that's THE trifecta, right?!) this is the way to go. The even better part is that, once you make this meal and eat all the chicken, you'll likely have leftover "mix" left. When added to some GF tortilla chips, this mix makes spectacular nachos.

INGREDIENTS:

- 4-6 chicken breast halves (more if you use a larger crock pot; I can easily fit 4 really large halves in a 4 qt. crock pot)
- 1 can black beans, drained and rinsed
- 2 cups salsa (I use the mild, Hill Country Fare brand from HEB) PLEASE read labels carefully!
- 1 can corn, drained or 1 cup of frozen corn
- 1/2 onion, chopped/diced

DIRECTIONS:

- Put the chicken in the crockpot (yes...it can still be frozen!)
- Mix the other ingredients in a bowl
- Pour the mixture over the chicken

- Cover and cook on low for 6-9 hours or high for 4-5 hours (you will have to cook frozen chicken longer than thawed chicken; the chicken will be more tender if cooked on low)

We love, love, LOVE this dish. The chicken stays so moist and takes on all the flavor of the ingredients. I cut up the chicken, top with the mixture, and melt shredded cheese on top. You can eat all you can and then scoop up the rest with chips. Everyone say "YUUUUM!" As I mentioned, the leftovers make great nachos.


This recipe is adapted from the Crockpot Salsa Chicken Recipe by Stephanie O'Dea.

And my other tidbit for the day:

Thursday, April 22, 2010

Creamy Corn Enchilada Casserole

So we had plans to go out to eat with some friends, but work schedules didn't pan out so I realized at 3:00 p.m. that I didn't really have anything planned for supper. My husband had a looooong day at work, so I wanted to have something we could just sit down, relax, and enjoy. So....TAHDAH!!! A quick-cooking, easy meal that really doesn't take too much prep time. Right up my alley...

Adapted from Stephanie O'Dea's Creamy Corn and Spinach Enchiladas

I made several changes to the original:
I am apparently allergic to spinach (can't win for losing, I know...) and I made this into a casserole because if you cook corn tortillas in a crock pot with any amount of moisture for long, things tend to fall apart. I am totally okay with eating a bowl full of mess, so I conquered this one by cutting to the chase and making a casserole rather than rolling enchiladas.

INGREDIENTS:

Filling:


- 1 can creamed corn (check labels as always, but I use Green Giant)
- 1 cup already cooked meat (I have made this with ground beef and chicken, but when I made this today, all I had in the house was ground turkey! ACK! Don't worry...it turned out perfectly! So much so, that I'll likely make it with the t-bird on purpose next time)
- 1/4 cup finely chopped fresh cilantro leaves
- 2 TBL chopped jalapeno
- 4 TBL Rotel (I had some extra from making a side of cheese dip so thought "why not?!")
- 1 1/2 cup shredded cheese

Sauce:
YOU WILL HAVE EXTRA SAUCE. DO NOT use all of it, or we'll have a runny, mucky mess on our hands. And who wants a runny, mucky mess?!

- 1 can enchilada sauce (original recipe calls for green enchilada sauce but this is my warning - READ LABELS! After 10 minutes of standing in the aisle at HEB, I realized that none (of the 6 brands of green sauce) were GF. I know you can find it at some specialty stores, etc., but I'll tell you that the red sauce works just great!! Am pretty sure I wouldn't make it with green sauce now even if I could easily find it...ya know...just to spite it! *sticks tongue out*)
- 2/3 cup sour cream

- Corn tortillas
- more cheese (everything is better with cheese on it...so we're gonna put some cheese on it!)

DIRECTIONS:
I use a 4 qt. crockpot, so number of tortillas and number of layers can be adjusted if using larger pot

Cook or brown your meat (depending on what you decide to use). I did this while I got everything else together! That's right...that's for all you multi-taskers out there)
I cooked the ground turkey with 1/2 onion and some Lawry's seasoned salt.


In large bowl, combine meat, creamed corn, cilantro, jalapeno, Rotel, and cheese.


Does it look a little nasty? Perhaps...but the taste later makes up for it. Promise.

In another mixing bowl, combine enchilada sauce and sour cream.


Spray bottom of crock pot.
Lay two corn tortillas on bottom of pot.
Spread 1/3 of filling mix over tortillas.
Sprinkle a layer of shredded cheese on top.
Using a spoon, drizzle approximately 1/2 cup of sauce across the top of the layer.


REPEAT until filling mix is gone.

Just for kicks (and because we're cheese fanatics) I add an extra sprinkling of cheese on top of the final layer (or, on the final layer, put the sauce down on top of the filling before adding the cheese).

Cover and cook on high 2-4 hours (I called my time at 3 hours), or on low for 5-7. According to Stephanie, she cooked hers for 8 and it got way too mushy. I'd shoot for the minimum time (for both high and low settings). Since all the ingredients in this meal are pre-cooked, you're really just waiting for the corn tortillas to soften a bit and for all the flavors to mesh.

I serve mine with a handful of tortilla chips crunched up on top - never hurts to have a little crunch, right?! I figure since you have to chew the chips more than you would if it were just the casserole, you're really just burning more calories :-)


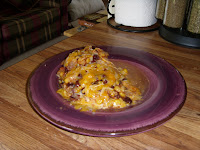
It's okay...I know you noticed. Yes, I already started eating (this happens when you get excited) and forgot to take a picture. So...clearly the pictures don't do it justice. Would it help if I hadn't included the pictures? Either way...

Turns out, this is a great dish. We both cleaned our plates...twice.