Saturday, July 31, 2010
Caramel Corn
This is a great recipe to make if you're having some folks over and you just don't know what to make. To be entirely honest, my reasons for making this tonight do NOT include that excuse. Mine are as follows:
(1) Sam went to the movies; I was bored. When I get bored...I cook.
(2) I worked all afternoon long (all HOT afternoon, mind you) cleaning our garage. I didn't have the energy to do anything more exciting.
(3) I have had several mini-bags of popcorn lurking in the back of my pantry for about a year now...taking up room and bullying the other shelf inhabitants. Enough is enough.
(4) It sounded soooo gooood.
Now I just have to figure out who to share all this caramel popcorn with....
Friday, July 30, 2010
THE bean dip
You know what they say....give credit where credit is due. So this "time out" is in honor of Sam, who knows how much I HATE grating cheese and always takes care of it for me when he can. Remember I said that I'm as cheap as I can be? Welp...to do it in a cheap AND healthy way, I always buy the blocks of cheese and do the grating at home. I'll go on and say it now...y'all wouldn't get half of these recipes if Sammi was not here to help me out - I'd call the game on account of rain (or lack of grated cheese). He's so great...
NOTE: On the Taco Bell sauce....
Yes..it is alright to stoop to the level of taking a couple extra packets if you stop in to grab a tostada (yep....GF!); however, you can buy the sauce bottled as well. At HEB it is only $.99 a bottle, so we take full advantage of it.
I know...I know...you're ready for me to quit typing so you can get the ingredients and get to rolling (that is...only if you haven't already cut me off and closed the window!) Really...I wouldn't make such a big deal out of this dip if it wasn't as good as it. Enjoy!
Tuesday, July 27, 2010
Potato-Cheese Soup
So all that to say....here's my version of the tasty combination of potatoes, cheese, and bacon (in soup form).
INGREDIENTS:
- 6 potatoes (I used new potatoes so it took about 8 of them - washed, peeled, and cubed)
- water to cover
- 1 onion, chopped
- 1 TBL margarine
- 3 cups milk
- salt and pepper to taste (I used a bit of Lawry's salt as well as some garlic salt)
- 2 TBL chicken broth
- 8 oz. processed cheese, cubed (Velveeta!)
- 1 TBL cornstarch
- 1/2 cup milk
DIRECTIONS:
- Place cubed potatoes in large pot and cover with water
- Boil for 10-15 minutes or until tender
- While the potatoes boil, sauté onion in margarine in a skillet over medium heat for about 10 minutes
- Once the potatoes are tender, drain all but about 2 cups of water
- At this point, I mashed up the majority of the potatoes with a fork - rather haphazardly, mind you! There is no right or wrong way! This is an optional step; I just like thick soup.
- Add the onion and replace the water with 3 cups of milk
- Reduce the heat to low and and season with salt and pepper
- Stir in the chicken broth and heat slowly
- Add the cheese, allowing it to melt completely (stirring as needed)
- In a small bowl, dissolve the cornstarch in 1/2 cup milk and add to the soup
- Mix the cornstarch mixture into the soup and heat until soup is at desired thickness
To each of our bowls, I added some crumbled turkey bacon as well as some shredded cheese. Hey...don't judge - there's never enough cheese *GRIN* I served this with leftover light and fluffy drop biscuits. This makes PLENTY of soup for a larger family or leaves you with "re-do's" for lunch or supper the next day.
Chebe's Corndogs
Recipe is from Delight Gluten Free magazine
Now, since the main ingredient in Chebe's is manioc (tapioca) flour, I suppose that CORNdog is a bit of a misnomer. Nevertheless...these babies are GREAT.
It has been entirely too long since I've gotten to partake in eating a corndog. Period. A few months after being diagnosed with Celiac Disease, I did purchase some GF corndogs at a store; however, I think my savings account may still be recovering! :-) Alright...so it isn't THAT bad, but it certainly is nice to be able to make something a bit cheaper (and even more yummy) for yourself.
INGREDIENTS:
- 1 pkg. of Chebe's All-purpose Mix
- 2 eggs
- 2 TBL oil/butter/margarine
- 5 TBL milk (plus a little more in case the dough is too dry)
- package of hot dogs (there is enough dough to make 6 so you'll have a couple left to feed the dog)
- wooden skewers
DIRECTIONS:
- Preheat oven to 375 degrees
- Prepare the dough as directed on the Chebe's All-purpose Mix package
- Divide the dough into about 6 equal pieces and flatten each out to a thin layer (Instead, I flattened the entire piece of dough out into a thin layer and, using a pizza cutter, cut the dough into 6 pieces)
- Poke a small wooden skewer through each hotdog to hold after the corndogs are cooked (I didn't have these - as you can tell from my lovely pictures- but the corndogs worked just fine as finger foods!)
- Poke a few holes in each hotdog with a fork (I did not do this, and as the hotdogs began to swell as they cooked, the dough was split)
- Wrap the dough around each hotdog (yep...I suppose this would be more like a lil doggie in a blankie!)
- Place the corndogs on a baking dish / cookie sheet and bake until the bread appears done (mine took about 20 minutes)
I served the dogs up with some baked beans and we enjoyed every bite. I would like to point out that I got this response from my husband: "Honey...I just ate 3 1/2 of your corndogs. I usually only eat two real ones....if that! Sounds to me like you did a great job..." (big grin from me!) Plus I know he would have eaten 4 if I hadn't have stolen the other half as I walked his plate of seconds to him!
--------------------------------------------------------------------------------------------
So...I mentioned earlier that you'd have a couple of hotdogs leftover to feed your own dog. Welp...our poor lil pup has food allergies (like mother like son, huh?). Now when I cook, it never fails that Walle sits at the edge of the carpet next to the kitchen and waits. Waits. And does a little more waiting - just in case I get sloppy and drop something. It's the only shot he's got, folks. So...just like every other night, Walle was sitting at his post. Turns out, there was a mostly deceased cricket nearby. So Walle began his puppy duty of swatting it about and I told him to cut it out (haha!) So...here is Walle doing as a puppy will do....
And...moments later (after being reminded that it'll probably make him sick to eat it)...adamantly insisting that he is NOT playing with the cricket
So...you see why it takes me so long to get things done around here...How can you ignore a face that cute?! It's the little joys in life. I just thought y'all should know what my sidekick was doing as I made this new meal :-)
Now, since the main ingredient in Chebe's is manioc (tapioca) flour, I suppose that CORNdog is a bit of a misnomer. Nevertheless...these babies are GREAT.
It has been entirely too long since I've gotten to partake in eating a corndog. Period. A few months after being diagnosed with Celiac Disease, I did purchase some GF corndogs at a store; however, I think my savings account may still be recovering! :-) Alright...so it isn't THAT bad, but it certainly is nice to be able to make something a bit cheaper (and even more yummy) for yourself.
INGREDIENTS:
- 1 pkg. of Chebe's All-purpose Mix
- 2 eggs
- 2 TBL oil/butter/margarine
- 5 TBL milk (plus a little more in case the dough is too dry)
- package of hot dogs (there is enough dough to make 6 so you'll have a couple left to feed the dog)
- wooden skewers
DIRECTIONS:
- Preheat oven to 375 degrees
- Prepare the dough as directed on the Chebe's All-purpose Mix package
- Divide the dough into about 6 equal pieces and flatten each out to a thin layer (Instead, I flattened the entire piece of dough out into a thin layer and, using a pizza cutter, cut the dough into 6 pieces)
- Poke a small wooden skewer through each hotdog to hold after the corndogs are cooked (I didn't have these - as you can tell from my lovely pictures- but the corndogs worked just fine as finger foods!)
- Poke a few holes in each hotdog with a fork (I did not do this, and as the hotdogs began to swell as they cooked, the dough was split)
- Wrap the dough around each hotdog (yep...I suppose this would be more like a lil doggie in a blankie!)
- Place the corndogs on a baking dish / cookie sheet and bake until the bread appears done (mine took about 20 minutes)
I served the dogs up with some baked beans and we enjoyed every bite. I would like to point out that I got this response from my husband: "Honey...I just ate 3 1/2 of your corndogs. I usually only eat two real ones....if that! Sounds to me like you did a great job..." (big grin from me!) Plus I know he would have eaten 4 if I hadn't have stolen the other half as I walked his plate of seconds to him!
--------------------------------------------------------------------------------------------
So...I mentioned earlier that you'd have a couple of hotdogs leftover to feed your own dog. Welp...our poor lil pup has food allergies (like mother like son, huh?). Now when I cook, it never fails that Walle sits at the edge of the carpet next to the kitchen and waits. Waits. And does a little more waiting - just in case I get sloppy and drop something. It's the only shot he's got, folks. So...just like every other night, Walle was sitting at his post. Turns out, there was a mostly deceased cricket nearby. So Walle began his puppy duty of swatting it about and I told him to cut it out (haha!) So...here is Walle doing as a puppy will do....
And...moments later (after being reminded that it'll probably make him sick to eat it)...adamantly insisting that he is NOT playing with the cricket
Saturday, July 24, 2010
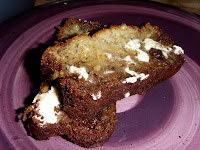
Raisin-Banana Quinoa Bread
recipe adapted from Delight Gluten Free magazine
You can find Amy's flour mix here or use your own GF all-purpose flour mix
DIRECTIONS:
- Preheat oven to 400 degrees
- In a large bowl, mix the cooked quinoa, flour, sugar/Splenda, salt, baking powder, and baking soda
- In a small bowl, mash the banana(s) (a fork works really well for this!)
- Add eggs and honey to banana and mix well
- Add the wet ingredients to the dry and mix well
- Fold in the raisins and nuts
- Pour into a greased 8x4 loaf pan
- Bake for 20-25 minutes (until toothpick comes out clean)
- Cool the loaf in the pan 10-15 minutes
- Slice it up, serve it up, and eat it up!! :-)
As always with banana bread, this recipe is very versatile. You can incorporate any fruit you want (raisins, cranberries, etc), nuts, chocolate chips, WHATEVER! I will definitely have additional versions of this recipe here on the blog in the future. Have another idea of what to try?? Send me suggestions!
CLICK TO ENLARGE |
DIRECTIONS:
- Preheat oven to 400 degrees
- In a large bowl, mix the cooked quinoa, flour, sugar/Splenda, salt, baking powder, and baking soda
- In a small bowl, mash the banana(s) (a fork works really well for this!)
- Add eggs and honey to banana and mix well
- Add the wet ingredients to the dry and mix well
- Fold in the raisins and nuts
- Pour into a greased 8x4 loaf pan
- Bake for 20-25 minutes (until toothpick comes out clean)
- Cool the loaf in the pan 10-15 minutes
- Slice it up, serve it up, and eat it up!! :-)
As always with banana bread, this recipe is very versatile. You can incorporate any fruit you want (raisins, cranberries, etc), nuts, chocolate chips, WHATEVER! I will definitely have additional versions of this recipe here on the blog in the future. Have another idea of what to try?? Send me suggestions!
Wednesday, July 21, 2010
Yummy butter
I might have...MIGHT have....almost cried when I ate this.
INGREDIENTS:
- 2 TBL butter/margarine
- 1 TBL honey
- 1/4 tsp cinnamon
DIRECTIONS:
- Mix it all together
- Eat this on top of Light and Fluffy Drop Biscuits
What a WONDERFUL dessert (or even breakfast, if you dare!) I used to always look forward to an evening out at Texas Roadhouse because of the cinnamon butter served with their rolls. Well...it is a bit more difficult to enjoy the butter sans rolls, so now that I found such great biscuits, it is high time to bring out the Yummy Butter!
BBQ Cowboy Beans
Recipe is adapted from $5 dinners
(This is a GREAT blog. For anyone who likes to cook things that are budget friendly whenever possible (who doesn't!?), this is worth checking out. There are some meals listed as gluten free; however, others (like this one) are pretty easily converted. Other allergen-friendly meals are available as well.)
INGREDIENTS:
- 1 lb. lean ground beef
- 1/2 onion, chopped
- Lawry's salt (or other seasoned salt, or just omit if you don't want the extra sodium)
- 2 garlic cloves, crushed (I use 1 tsp. minced garlic)
- 1 (15 oz.) can black beans, drained and rinsed
- 1 (15 oz.) can pinto beans, drained and rinsed
- 1 c. BBQ sauce (Sam and I are faithful fans of Head Country BBQ sauce. It is labeled GF and all versions are incredibly tasty)
- 1 (15 oz.) can petite diced tomatoes
- a few shakes of Worchestershire sauce (check to confirm yours is GF! I use French's)
- 1 TBL sugar (brown or white - just to cut the tang a bit if you want to)
ADDITIONS:
- 1/2 bag frozen corn - cook as directed (I cooked a couple of ears of fresh corn. You can just throw this last ingredient in right before you serve or use it as a side dish - your choice! Our thoughts: "why have to return the fork to the plate and back to your mouth TWICE when you can just do it once!?") *GRIN*
- DROP BISCUITS (these MAKE the meal)
DIRECTIONS:
- Brown beef with onion, garlic, and seasoned salt (to taste)
- Add beans, BBQ sauce, and tomatoes, sugar, and Worchestershire sauce
- Let simmer (the original recipe calls for only 10 minutes; however, I am a firm believer in the fact that meals such as this (chili, etc.) are better the longer they cook. I let mine simmer on low for almost an hour; however, you just do your thang! To be honest, the only reason I was able to make it that long without eating was because I was busy baking biscuits.)
I served this with some shredded cheese and then we had at it. We've got plenty left for "re-dos" (as leftovers are called in my family), and that is always the best part. I'll be making this meal again soon.
Light and Fluffy Drop Biscuits
Recipe adapted from Gluten Free Cooking School
Talk about something worth writing home about! Go on...get your pad and pencil, or break out your fancy stationary...it is well worth it! We'll wait....
Alright...I can't lie...I've been looking forward to trying these. I have spent quite a bit of time looking over various recipes for drop biscuits. Having tried a few others, I will say that, without a doubt, this is the best recipe I have found. I am looking forward to using this versatile recipe to try a lot of different things. Have no fear...I'll share my successes (and my failures...just so you don't have to!)
- 1 1/2 c. brown rice flour (I did not have any brown rice flour left, so I used 1 cup of white rice flour and 1/2 cup of sweet rice flour. It worked really well!)
- 2 c. corn starch
- 1/2 c. sorghum flour (this is the trick to making these light and fluffy! I have made drop biscuits with other recipes that turn out much more dense. These are a WONDERFUL change.)
- 2 tsp. baking powder
- 2 tsp. salt
- 1 1/2 tsp. baking soda
- 2 tsp. xanthan gum
- 1 stick of butter (chilled in freezer)
- 1 c. milk (can use soy if you cannot use dairy, but I used 2% cow)
- 1 T cider vinegar (if you want, omit the milk and cider vinegar and substitute 1 cup buttermilk. This will serve the same role!)
- 1 c. water
- 1 egg, beaten
DIRECTIONS:
- Preheat oven to 350 degrees
- In a large mixing bowl, combine first seven ingredients (flours through xanthan gum)
- Grate the butter into the flour mix using the small-holed side of a box grater
- Mix the butter into the flour mix so that there are no large balls of grated butter
- Add the milk, cider vinegar, water, and egg to flour mix and stir until combined (How easy is this recipe?! I know..I'm excited too!)
- Drop the dough onto a greased cookie sheet and bake for 15 minutes or until the tops start to turn golden brown
(The original recipe says that this will make 16 biscuits; however, mine made about 22. It totally depends on how big of biscuits you want!)
I could not be more pleased with how these biscuits turned out. Tonight I served them with Cowboy Beans (don't worry...that recipe is coming to you directly after this one). The meal was so good that it really kind of hurt *GRIN* Sam and I are still moving slowly around the house (if we're moving at all)!
I will definitely be using these for biscuits and gravy and all sorts of other things. Again, the light and fluffy consistency of this bread is FANTASTIC - especially since I am also allergic to yeast and just don't get that very often! Whew!
Another idea is to add garlic and shredded cheese to the dough. Once they are baked, I would brush the tops with butter and sprinkle on some garlic salt. Can we say Red Lobster-like?! I am excited!! It's the little joys in life....
Stay tuned for the Cowboy Beans and...if you're lucky...I'll even share our dessert!
Monday, July 19, 2010
A+ Lasagna
Confession #1: The only reason I am on here blogging is that there is no room left in my stomach. If there were, I would be downing another helping of this lasagna. I only wish I could tell you I'm lying. I'm not.
Confession #2: We'll call this A+ Lasagna because it is a mixture of ingredients my mother (Andrea) suggested and my own (Amy). Clever...I know. *GRIN*
Confession #3: The measurements for all of the seasonings are what I like to call a guesstimate. I tend to just add to taste or until I like the "feel" of it rather than actually measuring. I think I am close...so make it yours!
INGREDIENTS:
- 8-10 rice lasagna noodles (whatever kind you find that is GF is just fine. I used DeBoles rice lasagna. Please don't forget to double check the package you buy, but for the rice lasagna, you do not boil prior to putting the noodles in the casserole as you would with normal lasagna).
- 1 lb. lean ground turkey (you could use beef, sausage, or whatever you want)
- 1/2 cup chopped onion
- 2 TBL Italian Seasoning, divided (I use McCormick's Salt Free Italian Seasoning)
- 1 tsp course-ground black pepper
- 1 tsp minced garlic (two cloves)
- 16 oz. mozzarella cheese (Yes..it sounds like a lot. That's because it is a lot. I am not a fan of ricotta cheese that you normally find in lasagna, so I just incorporate more mozzarella. Well, that...and I like cheese. I used slices for the bottom layer and then shredded the rest.)
- 1 jar of spaghetti sauce (24 oz) (I used Classico Carmelized Onion and Garlic. Classico sauces are labeled as GF so that is always a plus!)
- 1 (8 oz) can of tomato sauce
- scant TBL of sugar
- dash of garlic salt
DIRECTIONS:
- Preheat oven to 350 degrees
- Brown ground meat with onion, 1 TBL Italian Seasoning, 1 tsp black pepper, and minced garlic.
- While the meat is cooking, combine the spaghetti sauce, tomato sauce, 1 TBL Italian Seasoning, scant TBL sugar, and a dash of garlic salt in a pot and heat
- Once meat is cooked, add the meat to the sauce mix
- Remove from heat.
- In a 9x13 baking dish, layer as follows:
- 1/3 meat sauce, noodles, cheese
- REPEAT until ingredients are gone, finishing with cheese on top
- Try to make sure that all areas of exposed noodles are covered with sauce
- Cover the dish with foil and bake for 50 minutes
- Uncover and finish baking for 10 minutes
*NOTE: when you cover the dish with foil, either cover so the foil will not touch the cheese or spray the foil with cooking spray before covering. We don't want to waste cheese by letting it stick to the foil!
Confession # whatever:
I am going to eat more.
And I am DEFINITELY making this again.
Subscribe to:
Posts (Atom)